Installing Ergonizer
Overview
Ergonizer can be installed as one of the following three options:
Basic Installation
Step |
More Information |
|
|---|---|---|
1 |
Check system requirements |
|
2 |
Download, launch and proceed the installer |
|
3 |
Verify that the installation was successful |
Step by step
The following procedure explains how to install Ergonizer on Microsoft Windows as a full installation from scratch.
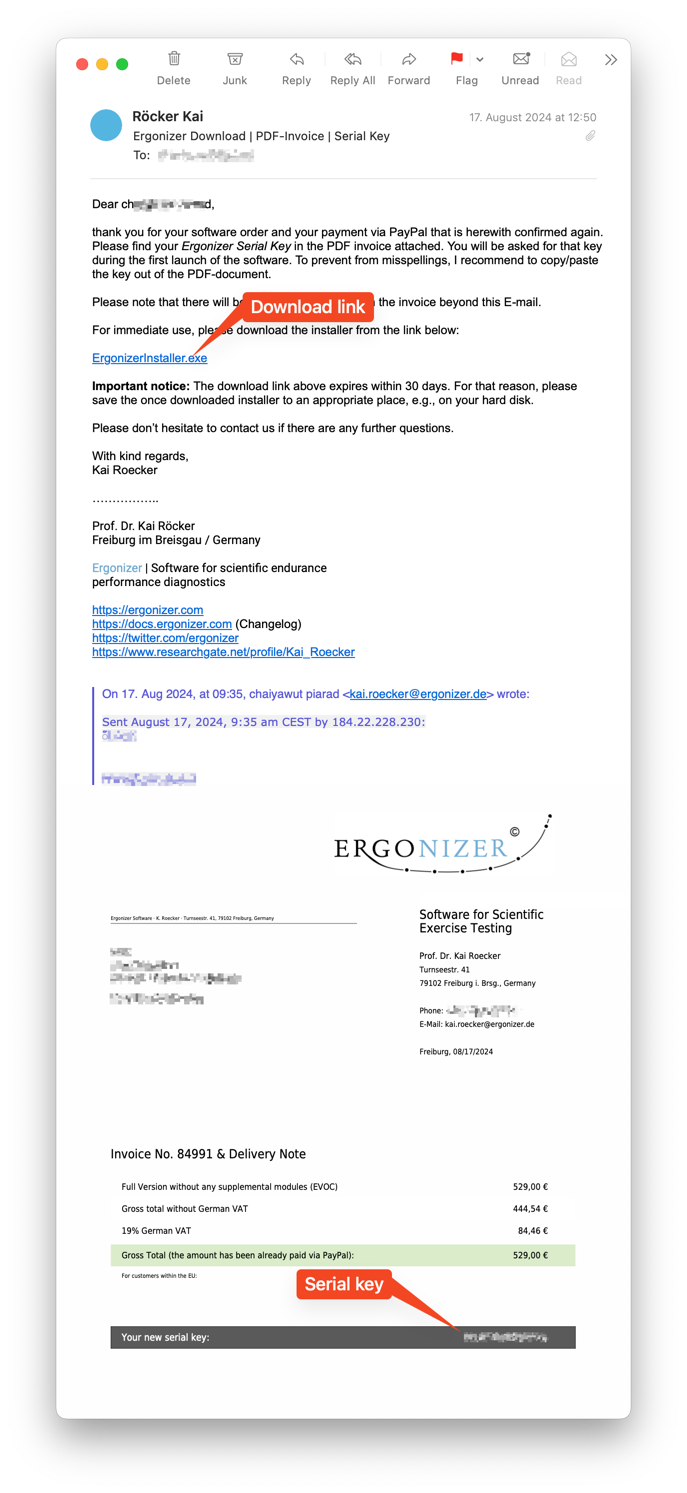
Open the installer download link in your personal E-Mail and download the installer
ErgonizerInstaller.exe. This download link is valid only for 30 days. So it is strongly recommended to save a backup of the installer file for full installations of Ergonizer at any later time.Warning
Save a copy of the installer file to a convenient backup!
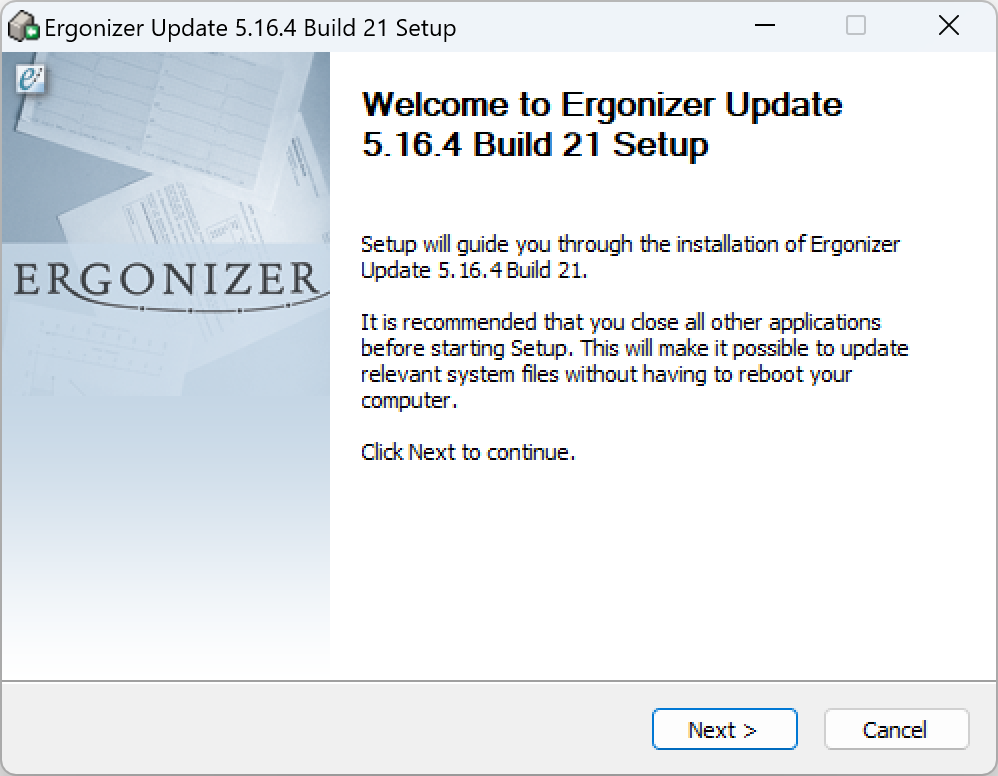
After download, start the installer file ErgonizerInstaller.exe with a double-click and follow the on-screen instructions to complete the installation
The installation tool start screen appears. Click
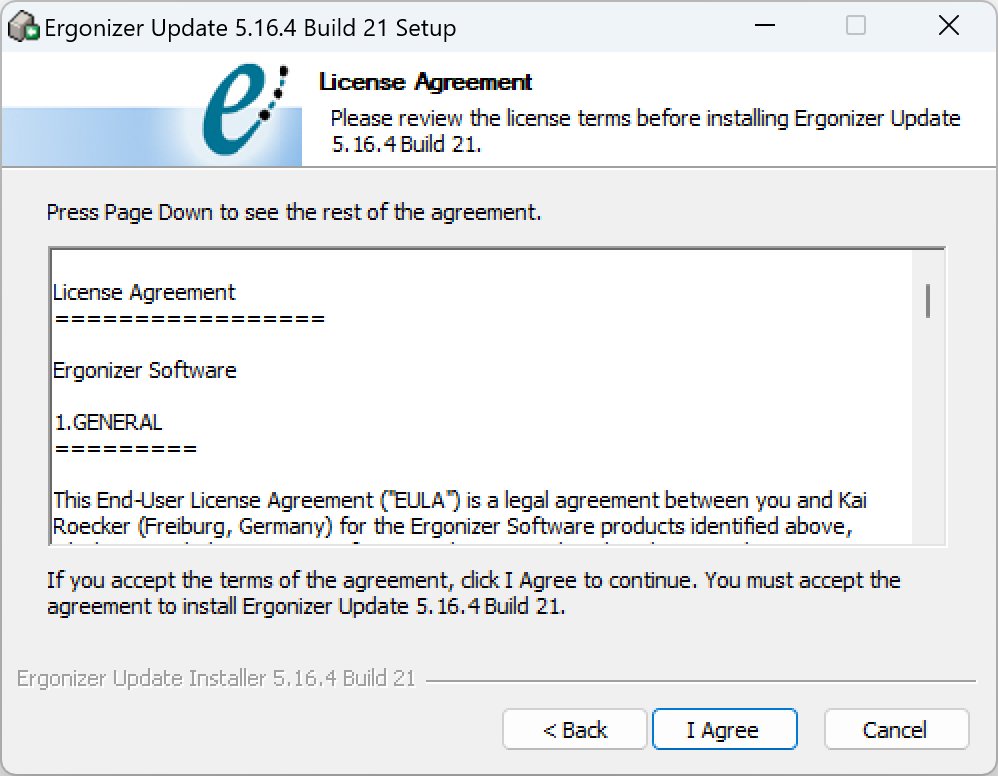
Nextto proceedRead and accept the License Agreement
Choose the directory where Ergonizer should be installed. The recommended default is automatically set
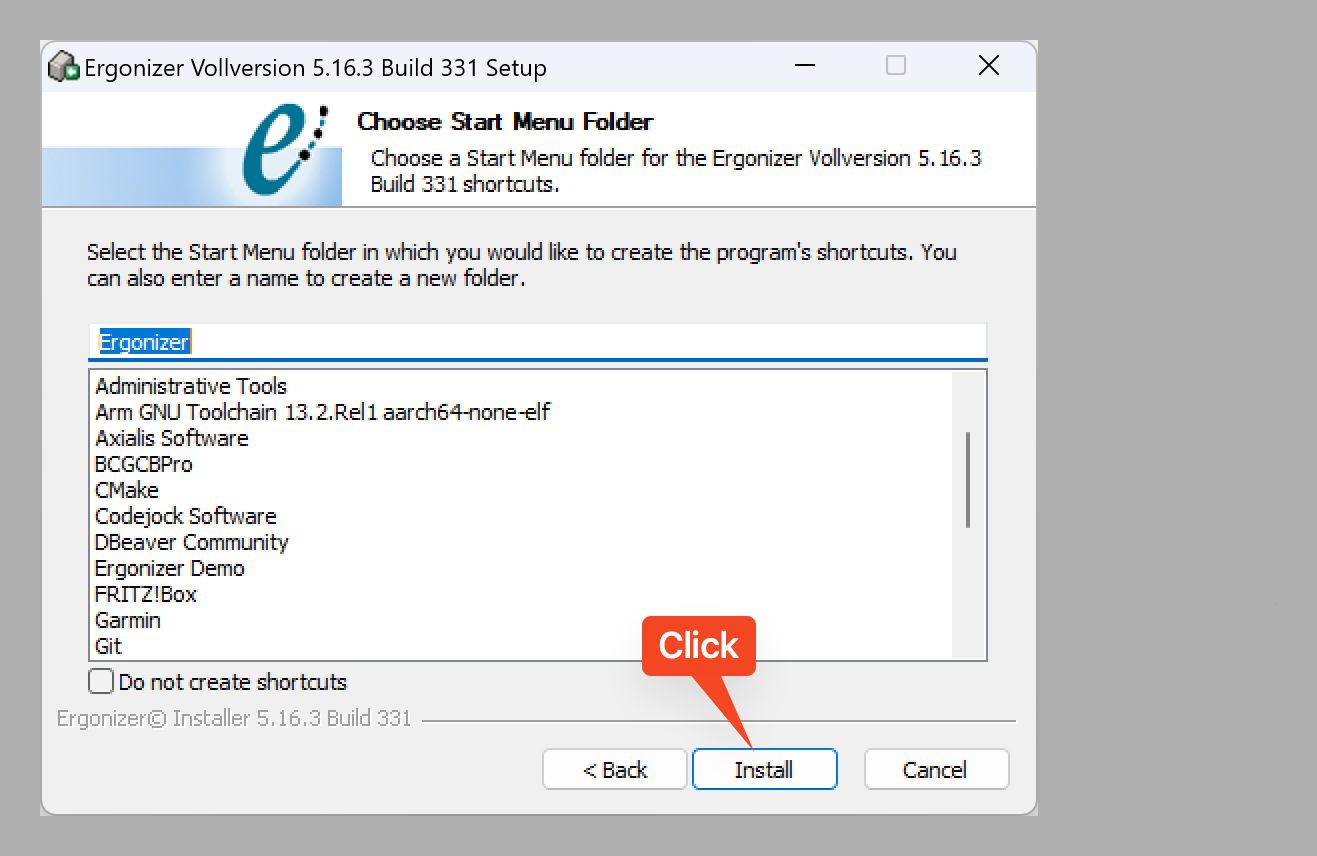
Choose a Start Menu folder. The recommended default is automatically set
Click
Installto copy the program files to your PC

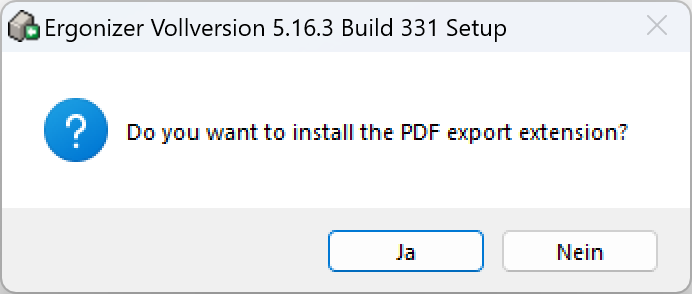
Answer whether you want to launch the Ergonizer specific PDF writer installation
Click
Next, thenFinishto complete the installation
Verify the Installation
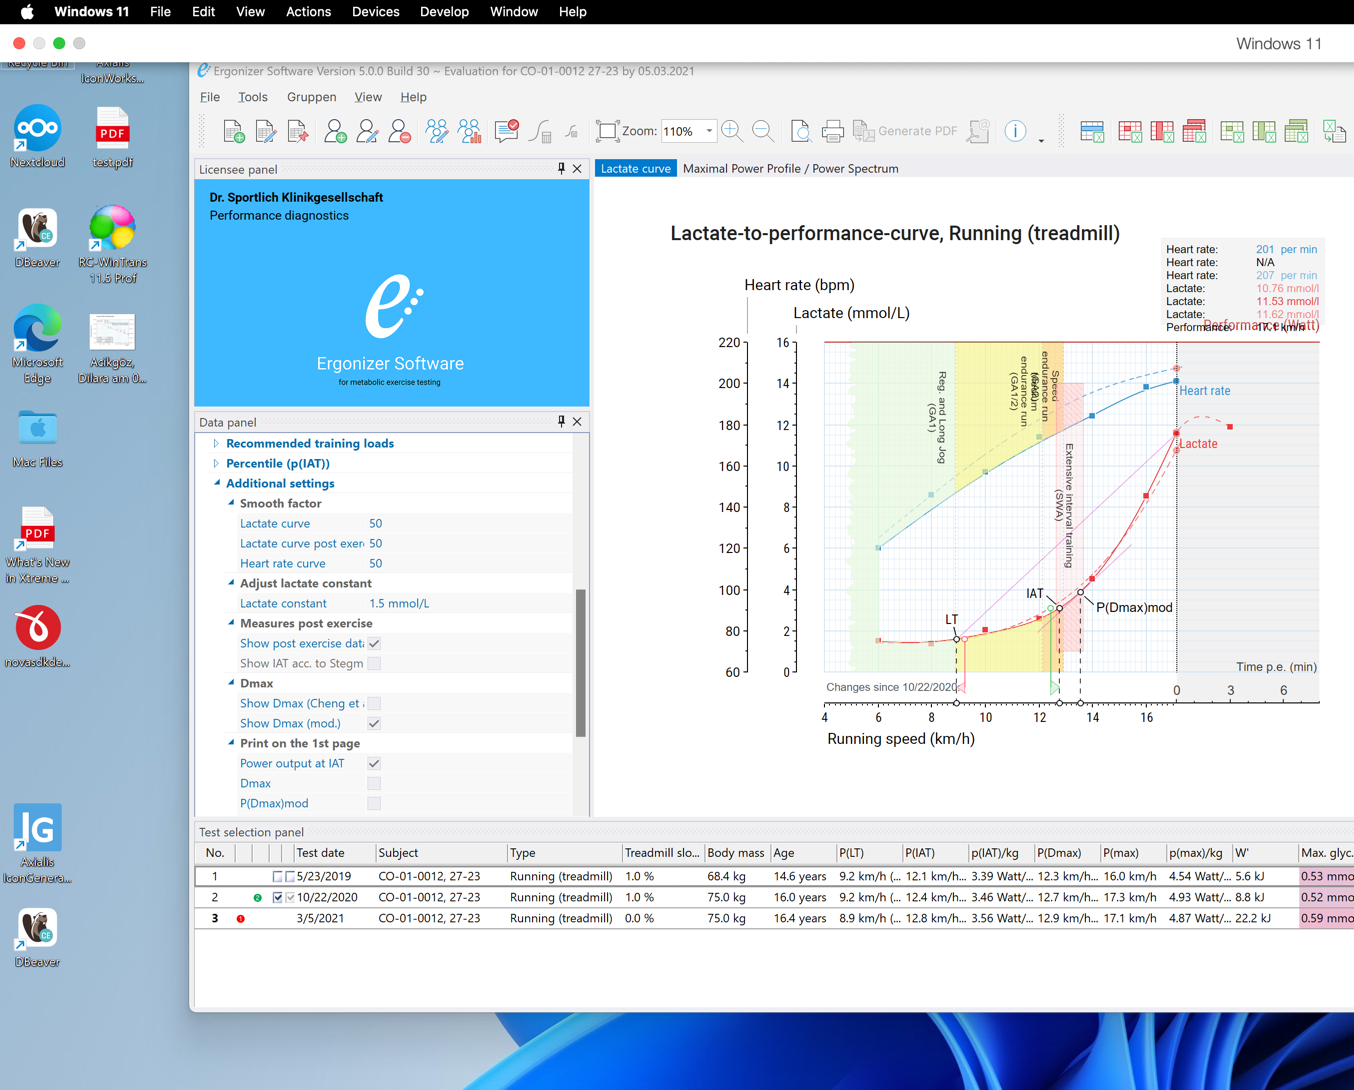
Launch Ergonizer from the installer finish page, the Start menu, or the desktop shortcut
Enter your license key. You will be asked once to enter the license key, provided by mail
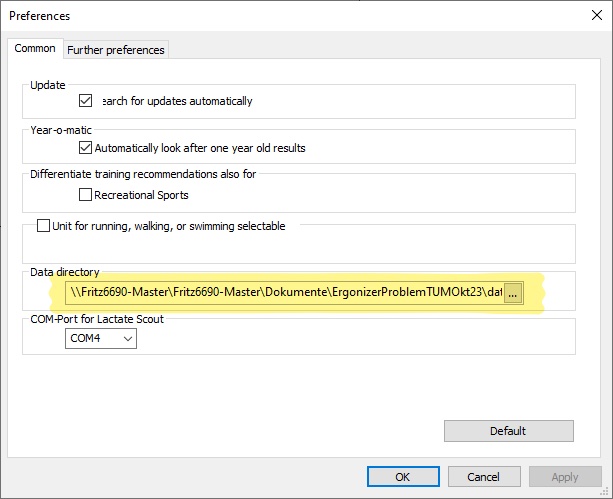
Check the storage location for the measurement data at . Default is
./datawithin the program folder of ErgonizerIf you want to check for updates automatically, go to and activate the option
Search for updates automatically(requires an active Internet connection)
If you have any questions or need help, please contact Ergonizer support via email or visit www.ergonizer.com for further information.
Configuration Options
Location of the Database File
During installation, a default data folder is created at [Ergonizer program folder]/data. You can modify this data folder location in the preferences under
Database File Relocation
If you enter an empty path here, the Ergonizer database path will be initialized
automatically to the default location and with an empty database at the next
start of Ergonizer. Anyway, you can transfer any original database file
ergonizer5.db or ergonizer6.db from a formerly used
data folder to the new one. Database files contain your measured data in a
structured way.
Tip
Ergonizer always uses only one database file at a time
Important
If you modify the path to your database, ensure that the new location is accessible and writable, and that the new location is backed up regularly.
Installation on macOS
As mentioned above, Ergonizer is not natively available for macOS. However, you can use a virtual machine to install and work with Ergonizer without restrictions on Macs. An uncomplicated virtual machine application is, for example, Parallels Desktop for Mac. We recommend the one-time purchase available on their website. With any virtual machine, such as Parallels, the installation procedure for Ergonizer is the same as on any “real” Windows system.
With newer Macs that have an Apple Silicon processor, the usage of Parallels
implies the installation of a special Windows version for ARM. Ergonizer runs
well on this Windows version, but with one restriction: our internal PDF writer
routines are not available now. However, in this case, PDF documents can be
generated by using the Print function of Ergonizer and selecting any PDF
printer driver available.
Another option is to install Ergonizer on a remote server and access it via a remote desktop connection. This way, you can use Ergonizer without any restrictions on your Mac or any other device with iOS, iPadOS, Android, or Unix; anywhere Remote Access tools are available.
Older Macs with Intel Processor (Boot Camp)
On older Macs with Intel processors, Windows can be installed using the built-in
Boot Camp tool.
However, when using Ergonizer, running Windows in a virtual machine
—such as Parallels— is often more practical, since it allows you to run macOS
and Windows applications at the same time.
Ergonizer on an Online Virtual Machine
Ergonizer can also be installed on an online virtual machine. This allows you to use Ergonizer on any device with an internet connection. The virtual machine is hosted on a server and accessed via a remote desktop connection. With this setup, you can use Ergonizer without restrictions on your Mac—or on devices running iOS, iPadOS, Android, or Unix—anywhere remote access tools are available.
Updating from a Previous Version of Ergonizer
Checking if Updates are Available Online
We continually improve Ergonizer with new features and bug fixes. Therefore, check for new versions manually (@check_manually) about every two weeks, or enable the automatic update check in Ergonizer (@check_automatically). If the “Check automatically” option is enabled, Ergonizer checks for new versions at each launch (but no more than once per day).
Select or use the shortcut Ctrl+Shift+U to check for updates manually while Ergonizer is running.


Options from the Online Update Check
After manually checking for updates, Ergonizer will inform you about the result
B. A newer version is available online, but you have no active license to install it
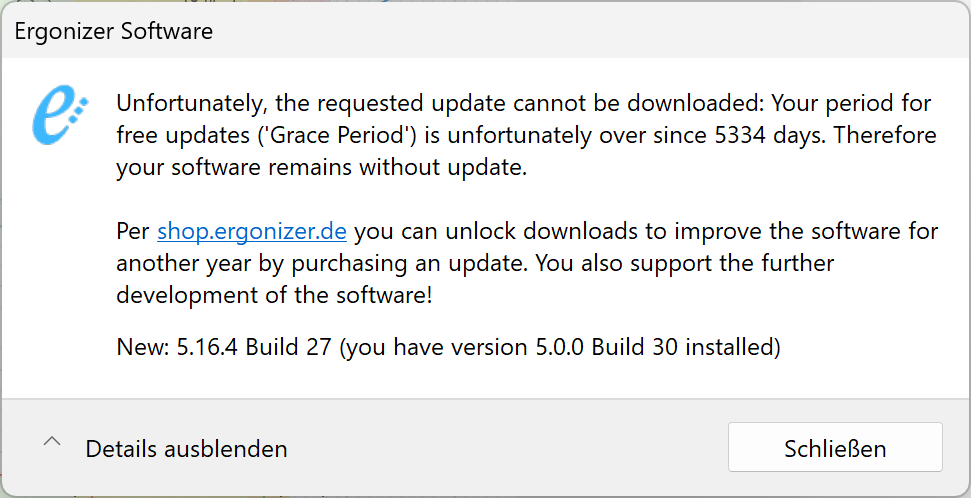
This applies if your update subscription (grace period = one year after purchase) has expired. The dialog shows how many days have passed since the subscription expired. To renew the update subscription (required only to receive updates), visit the Ergonizer shop.
C. A newer version is available online, and you have a license to download and install it
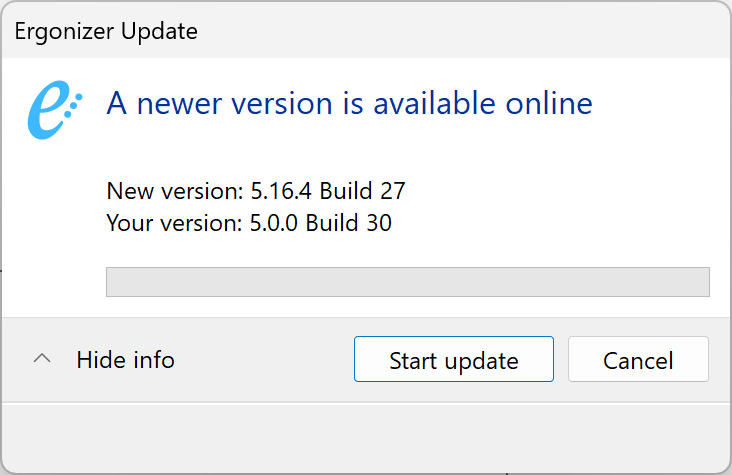
In this case, please click the Start update button. The installation routine should start automatically after download; if not, start the routine by double-clicking it.
Install the Trial Version
Tip
Fully functional trial versions of Ergonizer are available for download online. While offering complete functionality, trial versions are limited in terms of the maximum number of subjects and tests. Additionally, the trial version is valid for 30 days from the date of first use.
Request a Download Link to the Trial Version
To request a download link for the trial version, please fill out the contact form on the Ergonizer download page. After submitting the form, you will receive an email with link to the trial version installer. The system requirements for trial versions are identical to those of the full version of Ergonizer.
Open the installer download link in your email and download the installer file (
ErgonizerTrial.exe). Please note that the download link to the trial version will expire after 5 days after reception. If the link expires before you are able to download the installer, request a new download link via the mentioned contact form.Once downloaded, double-click
ErgonizerTrial.exeto launch the installation and follow the on-screen instructions to complete the installation.
Uninstall Ergonizer
Follow the following steps to remove Ergonizer completely from your computer
In Windows Explorer, open the folder where Ergonizer was installed previously (default installation path:
[Program folder]\Ergonizer\data)Double-click
Uninstall Ergonizer.exeIn the dialog, click Uninstall to remove Ergonizer from your system
Follow the on-screen instructions to complete the uninstallation process
Important
Any personal data files generated previously are not removed during
the uninstallation procedure. The Ergonizer database file can be found at
[Program folder]\Ergonizer\data even after a complete uninstallation
Caution
Please take in mind that this procedure is unrecoverable and cannot be made undone except with a new full installation.
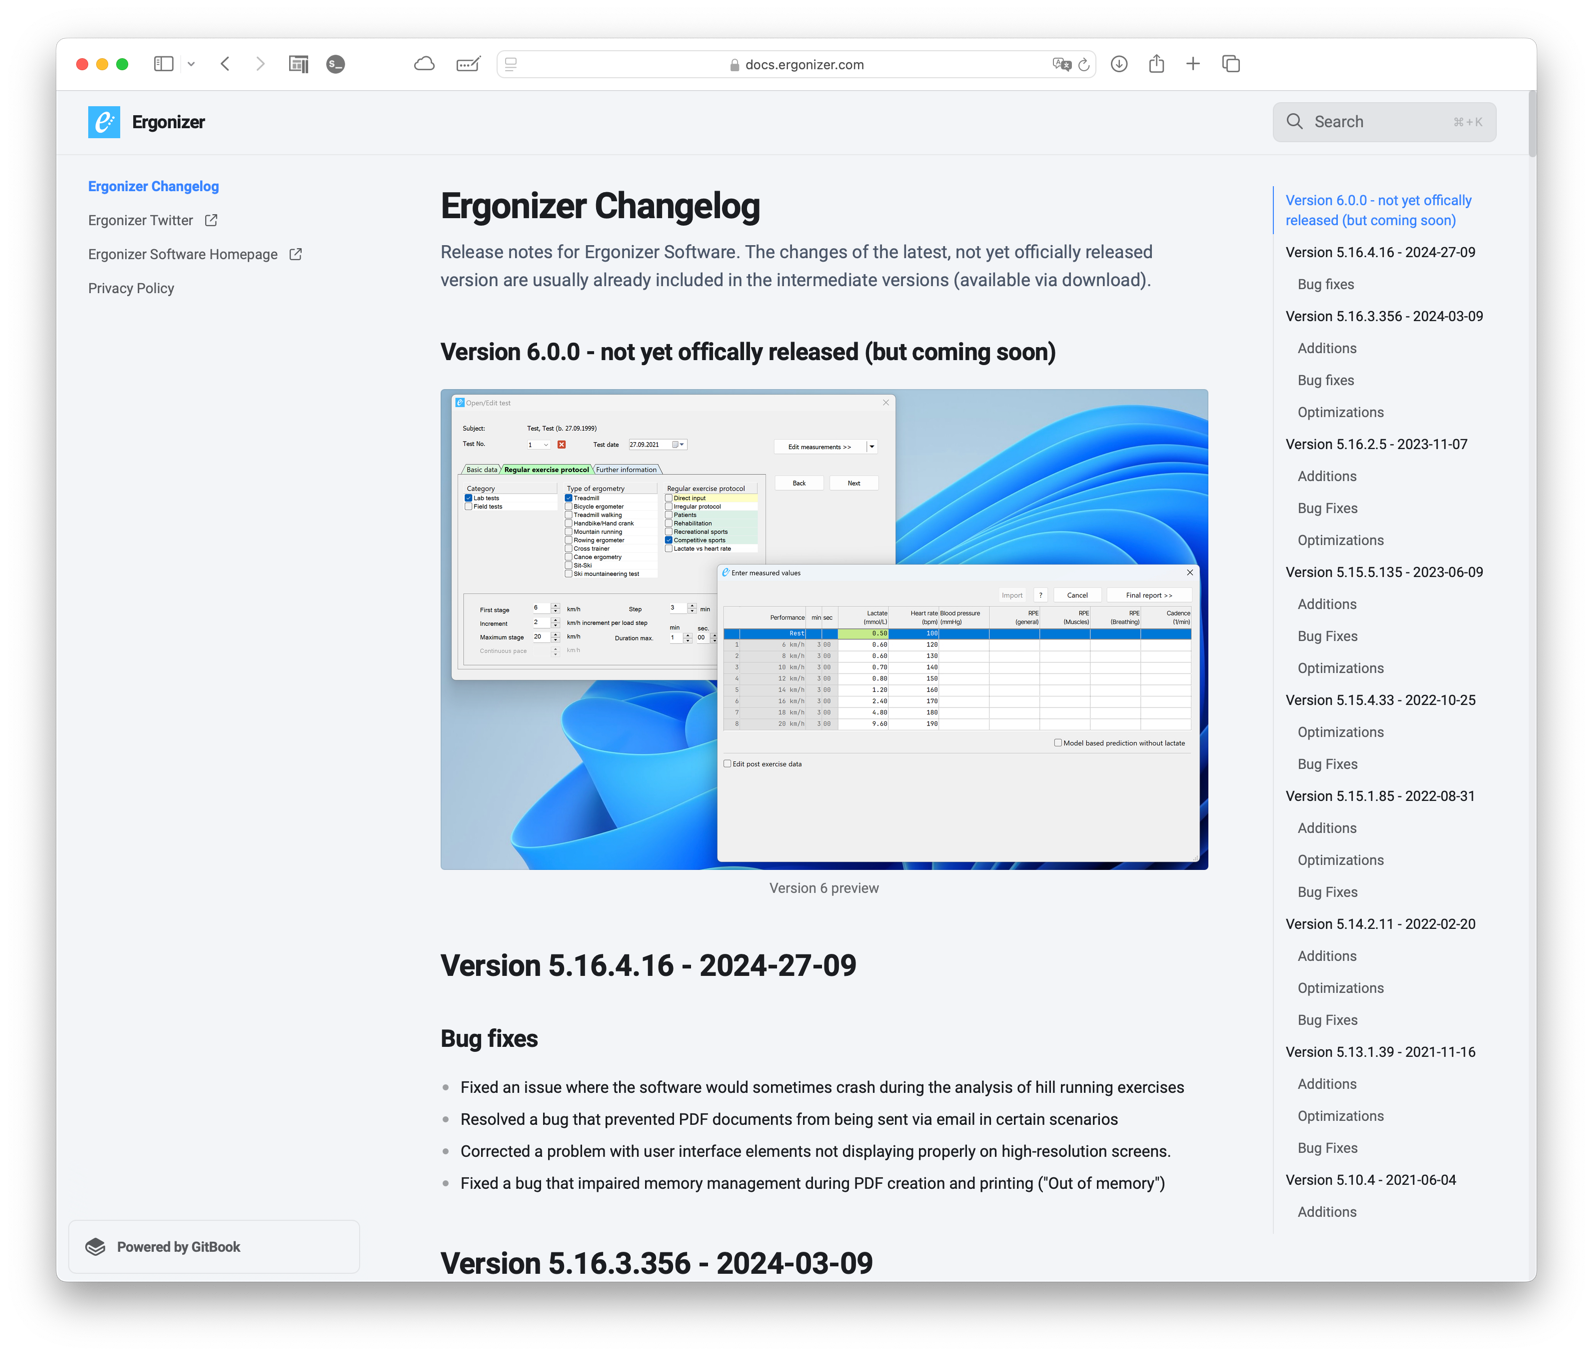
Changelog
A version history of Ergonizer is available at the Ergonizer Changelog (Fig. 11).